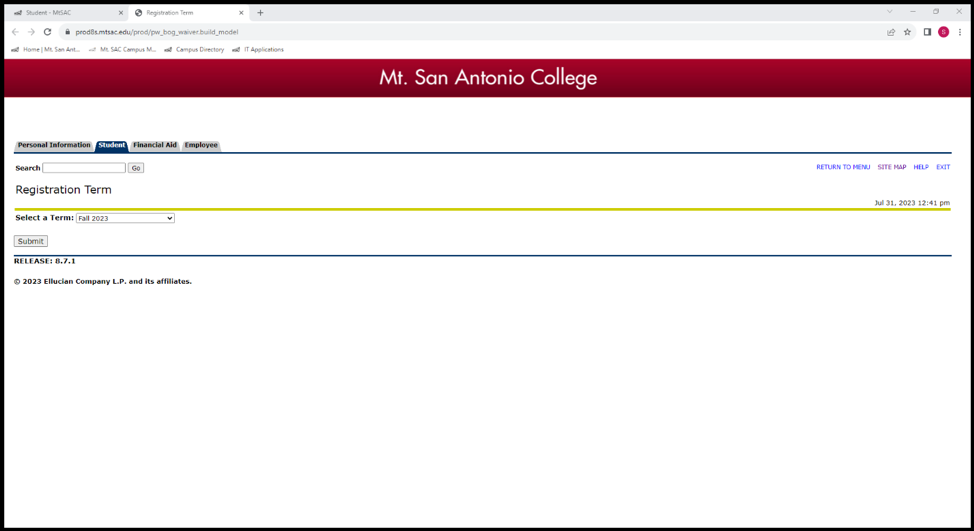
On the Registration Term page, "Select a Term" from the drop down menu.
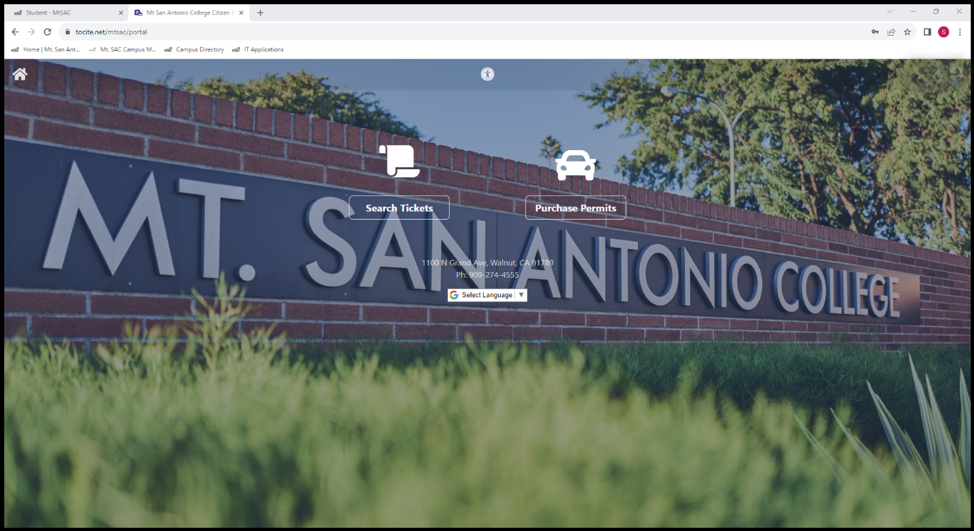
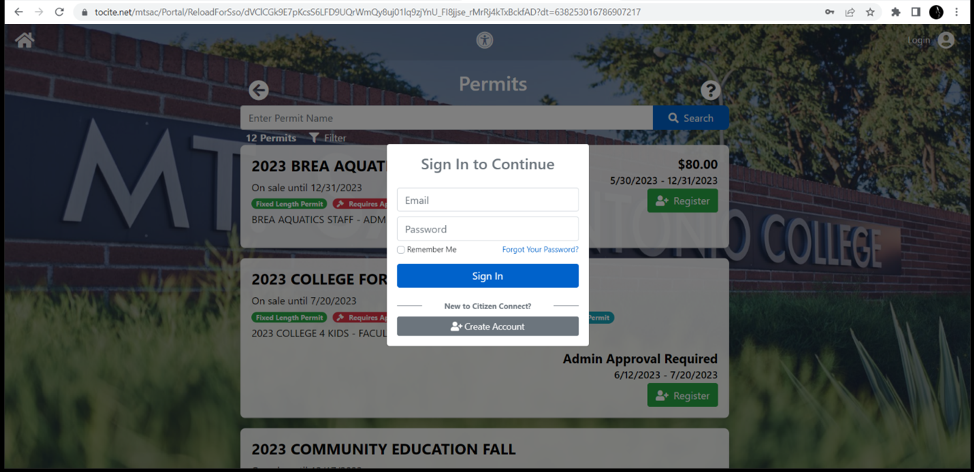
Click “Purchase Permits”.
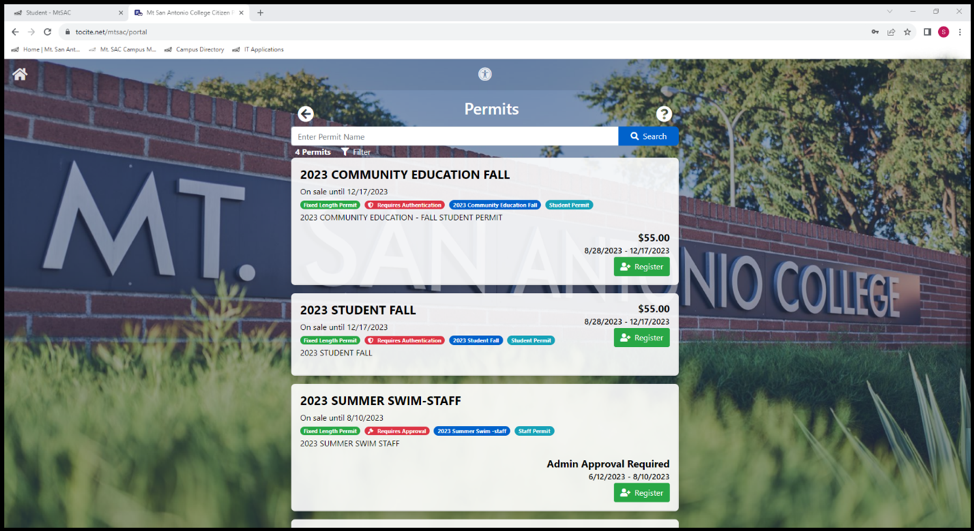
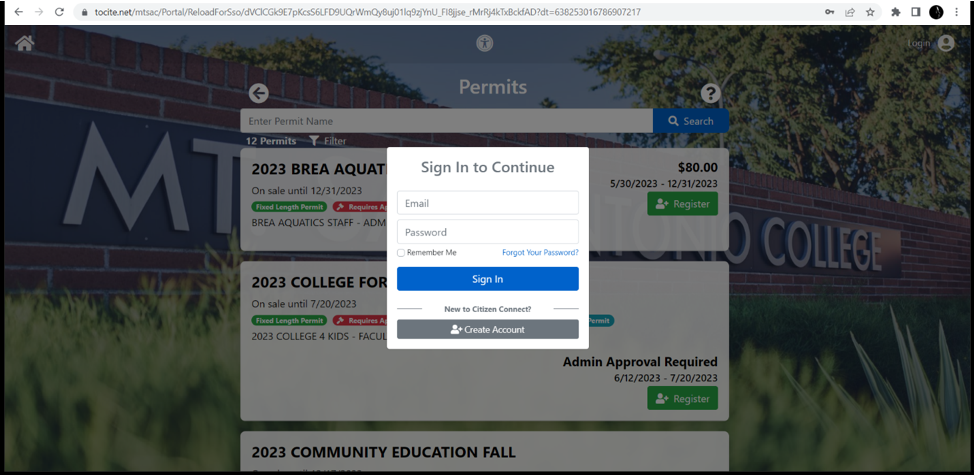
Select the "Student" permit for the appropriate academic term and click the "Register"
button
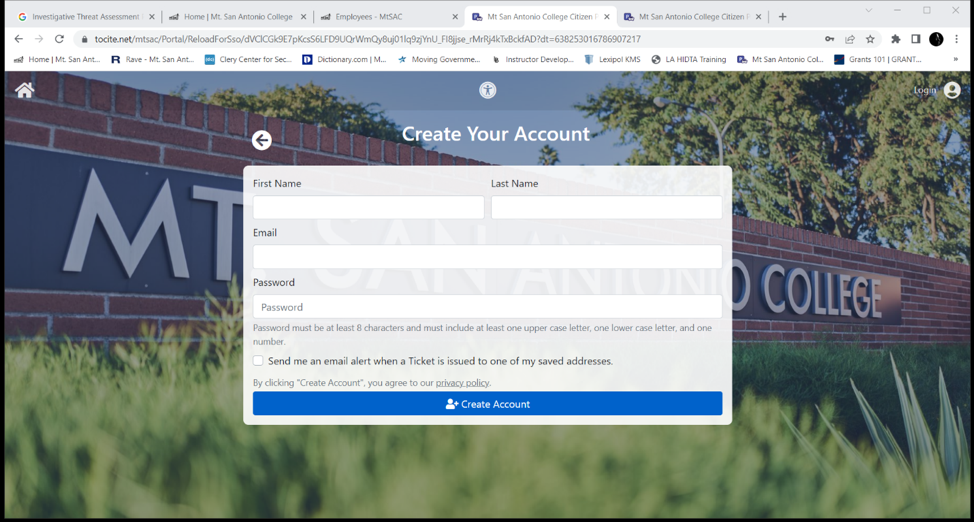
First time users must click "Create Account" and complete the registration information.
Provide name, email, password, and then click "create account" bar.
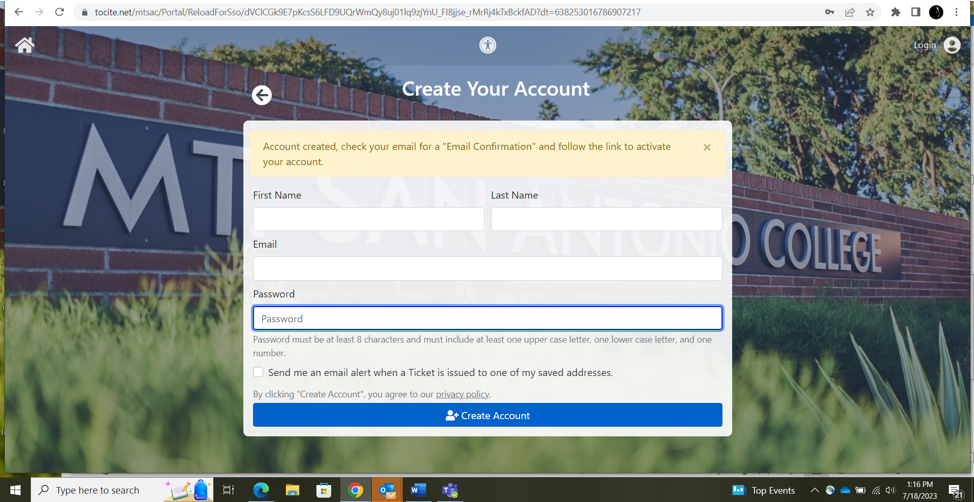
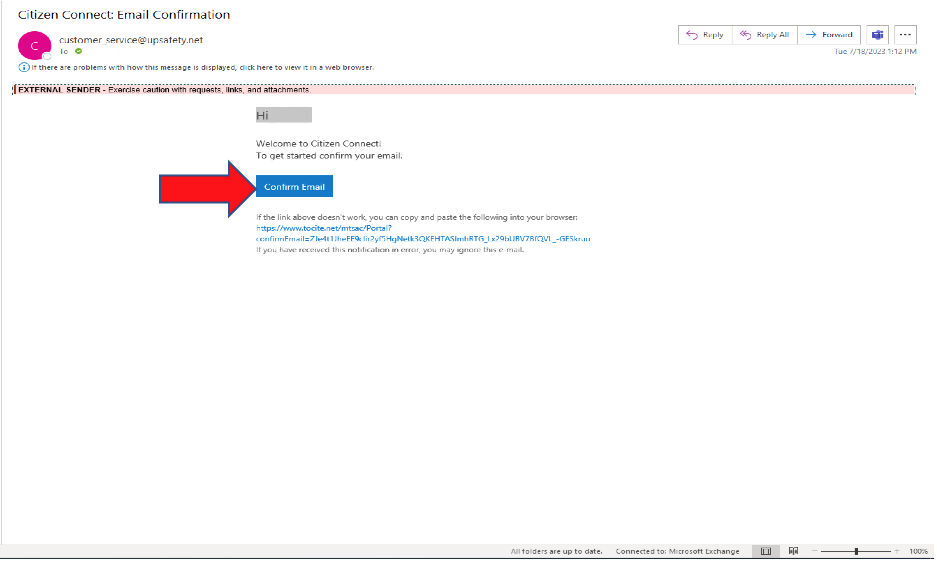
After creating the account, check provided email account for a message from customer_service@upsafety.net - Citizen Connect: Email Confirmation" to confirm.
In the body of the email received, click "Confirm Email".
Click "Sign In" to access account - using the email and password provided earlier.
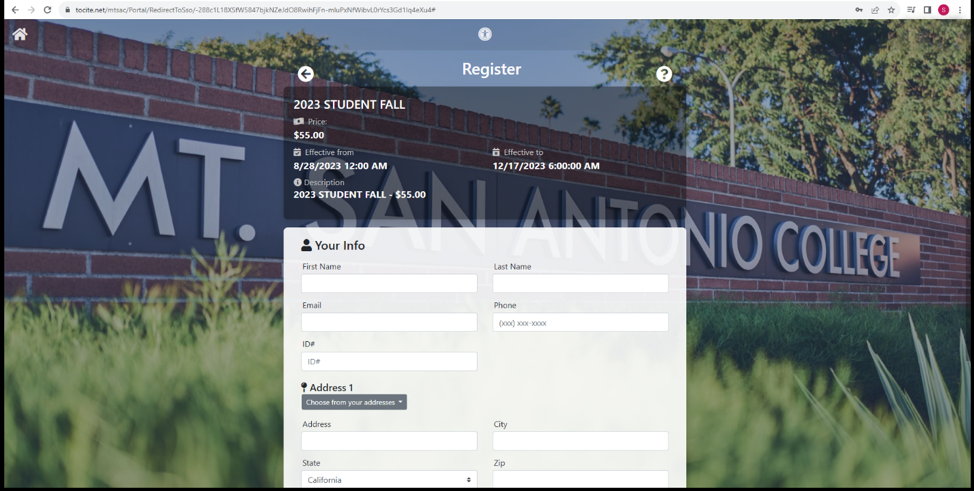
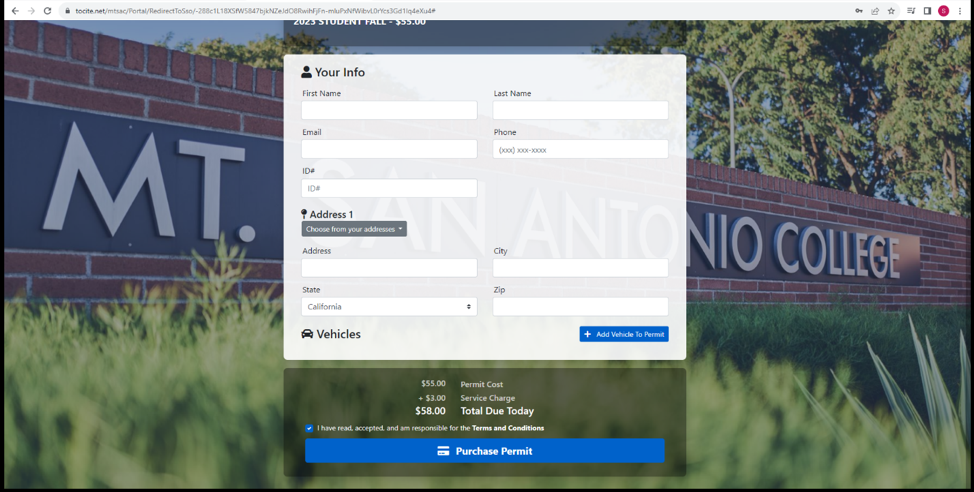
Confirm your permit type and price = "Student Fall" and the amount.
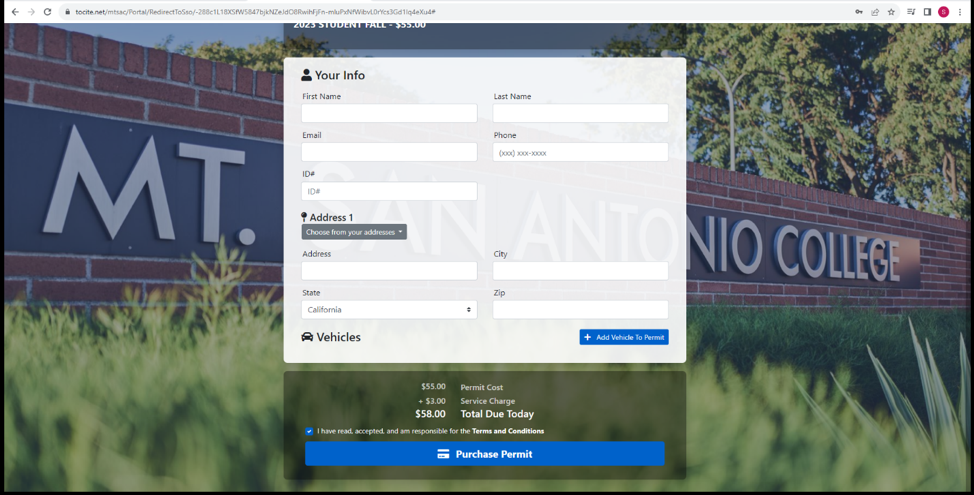
Complete "Your Info" area with Name, Email, Phone #, and Address Information.
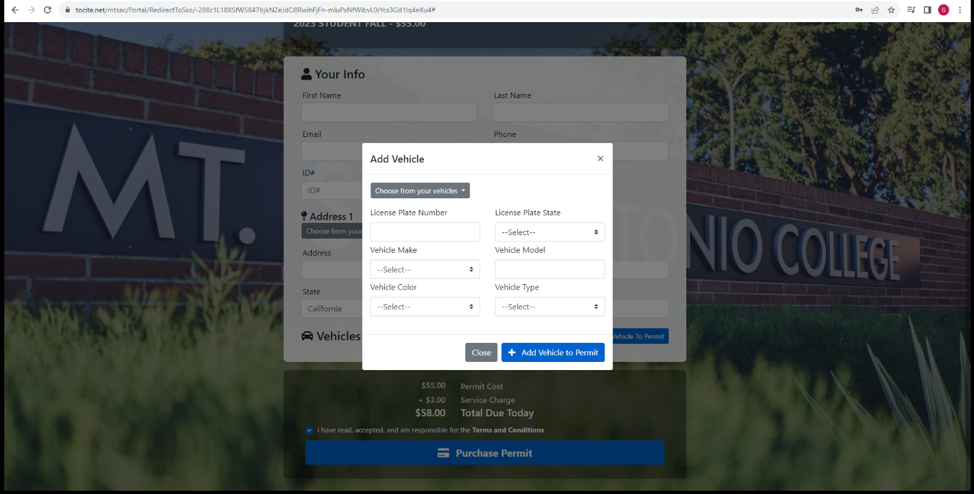
Complete the "Add Vehicle" information. Students may add two vehicles to their account.
Click "Purchase Permit"
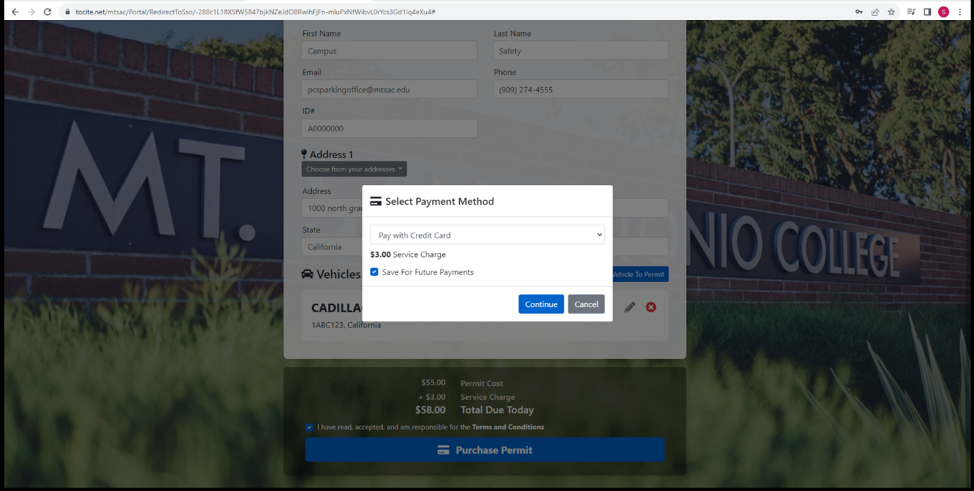
Select a payment method.
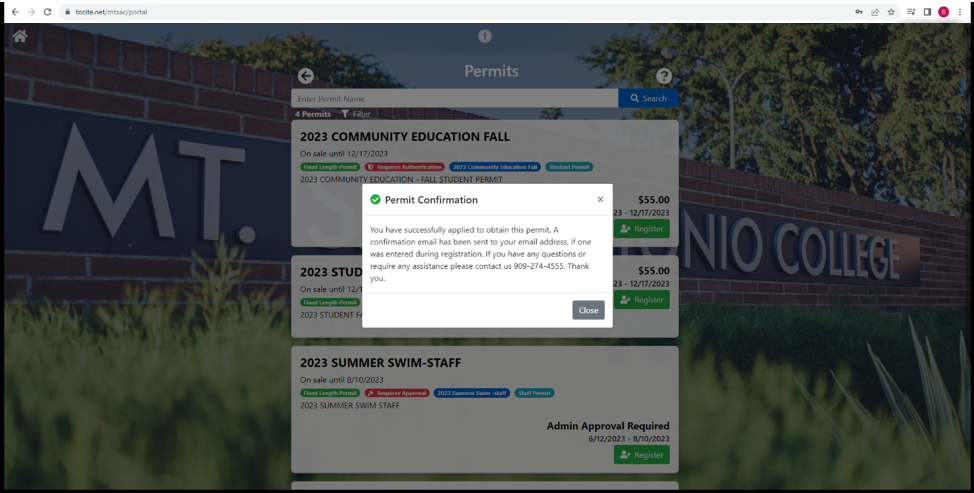
After payment is approved, the "Permit Confirmation" message will appear.
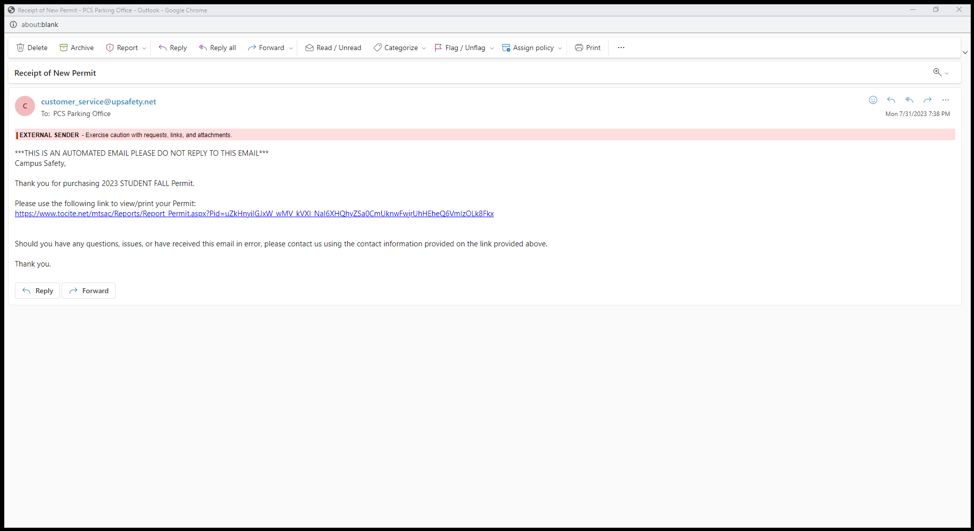
The student will also receive a "Thank You " email confirming the purchase of the
parking permit.